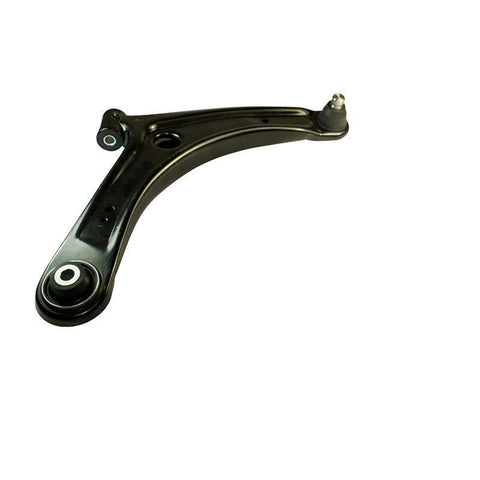
Nolathane Front Lower Control Arm - RH | 2009-2015 Mitsubishi Lancer Ralliart (REV029.0084)
Give us a call to get the best prices and parts for your build. Or, just call us with a cool racing story...either way we're here.
Phone Call or Text 651-927-4510
Email - sales@maperformance.com
Call Or Text Our Experts at 651-927-4510
*SEE DETAILS
2009-2015 Mitsubishi Lancer Ralliart Front Lower Control Arm (Right Hand) by Nolathane
Most would agree that the time and stress to remove and replace bushings and ball joints to suspension arms can be hard to justify. Making up press tools and damaging arms are just two of the problems one can endure.
Why put yourself through it when you can purchase complete arms, fitted with known and trusted Nolathane bushings and premium quality ball joints (if applicable).
Features
- Front Lower Control Arm
- Fitted With Bushings and Ball Joints (if applicable)
Applications
- 2009 - 2015 Mitsubishi Lancer Ralliart
- 2010 - 2011 Mitsubishi Lancer Ralliart Sportback
What's In The Box?
- 1 - Front Lower Control Arm (RH)
Warranty
- Manufacturer Standard Warranty
Sup. My control arms needed a change, the bearings were worn, these cost a bit more than some of the other OE replacements however the quality is worth it.
Turning has become remarkably easy compared to before and is much more smooth (changed both sides). Definitely worth the price. Also the metal itself is pretty high quality, no visible problems. I really cannot describe how smooth my steering is now.
Took some time to install myself and you will need two socket wrenches (if you have a 1/4 and a half that's what I used) and a pipe to extend the wrench to get off some of the bolts. It's doable. I also recommend having a small jack (the emergency jack in the trunk for example) to help line up the bolt that goes in the hole closest to the intercooler. I had to raise the arm, push it towards the engine, slide in the bolt, then lower it a few mm to get it in the thread. Also a hammer and towel to prevent chips to get the one closest to the exhaust in. I also hammered in the two larger bolts. The one by the exhaust and the one under the strut tower have a nut and bolt while the one by the intercooler just has a bolt. Definitely doable on your own, took me about 3 hours to do both sides. The second one was easier.
They also provided some grease for the rotational surfaces.
Highly recommend.
Oh, I also had to take off the caliper and rotor. Made it a lot easier. And put the rotor back on using it to push the arm into the bolt by the intercooler (which I did last, but you could do that bolt second and the one under the strut tower last too). May make it easier for you. ✌🏻

